
Do you find yourself staring at your log cabin, thinking: How in the world can I stain this log cabin while still caring for the chinking? That’s a valid question. In this blog we will talk through the 13 steps of staining a log cabin with chinking.
Alright, let’s jump into the steps of this process…
13 Steps: How To Stain A Log Cabin With Chinking
To make this process easy to understand and execute, we’ve outlined thirteen steps for any log cabin staining and chinking project. Here we go!
1. Inspect the Logs
It can be tempting to skip to the “fun” parts of the process, like applying the stain. But first, take a breath and slow down. You need to inspect each log for damage. Are there cracks in the logs of your cabin? If you notice cracks that are one-quarter inch or larger or ones that extend to the end of the log, it’s important to take note of those so you can fix them during this process. Not only will it enhance the aesthetic, but it will also keep water out of your cabin.
As you inspect the cabin, look for rust or rot. If you find some, don’t try repairs on your own. At this point, we suggest you get an expert involved before you proceed with staining and chinking.
2. Inspect the Chinking
That’s right: more inspecting. Closely observe the chinking on your log cabin. Are there cracks in the chinking? Is some of it damaged? Are portions of chinking missing? Once again, ensuring your log cabin’s chinking is intact protects it from water damage or other harm and keeps it looking beautiful and inviting.
3. Take Inventory
Now that you’ve finished your inspections, you don’t want to forget anything you noticed. Take photos of all the problematic parts and write detailed notes about each one. As a result, you’ll be able to efficiently repair each one when that step arrives.
4. Protect the Area
We both know it: repairing and staining jobs leave room for a lot of unwanted spills and dust. To avoid this from happening, we strongly recommend that you take your time to protect the surrounding areas. Put plastic on all your windows (no one wants to scrape stain off them!) and the floor around the cabin.
This process can seem so tedious, but in the end, we promise you’ll be grateful you completed this step.
5. Remove Old Stain
Obviously, you don’t want to add the new stain to the old, peeling stain on your log cabin. So, this is what you are going to do. Using a glass blaster, you’ll remove all of the old stain. Why a glass blaster? Not only does it get the job done fast, but it also doesn’t leave residue all over the place. In fact, it simply dissolves into the air. Even if there is some build-up on the ground, you can sweep it up to reuse. Additionally, using a glass blaster doesn’t introduce water to your log cabin, keeping it further preserved.
Here’s the best part: if you do thorough work with a glass blaster, you won’t have to sand and buff each section of your log cabin!
6. Fill the Cracks
Remember all the cracks in the logs you found before? Now it’s time to address them. First, tape off the cracks, leaving about a 1/16 inch of the log exposed. This enables the caulk to stick effectively to the wood. Next, place a foam rod into the crack, which creates extra insulation for the cabin and prevents you from using excessive caulk.
Now, you can caulk the crack. Of course, no one wants an unsightly caulk line on their beautiful logs. The good news is that this can all be avoided very easily. After you have applied the caulk, use a caulk spoon to ensure that you create a smooth, seamless line, blending into the wood itself.
7. Let It Dry For 48 Hours
Here’s the deal: this project is going to take some patience. If you had to caulk any cracks in the chinking or add portions of chinking to your log cabin, ensure that you give it 48 hours to completely dry before you go on to the final steps.
Now you can kick back and enjoy another part of your life (or tackle another project)!
8. Sand The Logs
Now, if you did a thorough job on step 5, you won’t have to worry about this step!
But if you are finding that some of the old stain is still stubbornly adhering to your log cabin, it’s time to sand it off, once and for all. Or, if you had to fill in a bunch of cracks, sanding the remaining residue is a good idea. Using a buffer, you will slightly sand the exterior, enabling the log to absorb the stain effectively.
9. Brush Off The Dust
After (and if) you’ve finished sanding the logs, it’s time to brush off all the dust on the exterior with a clean, dry paintbrush.
10. Paint Logs With Stain
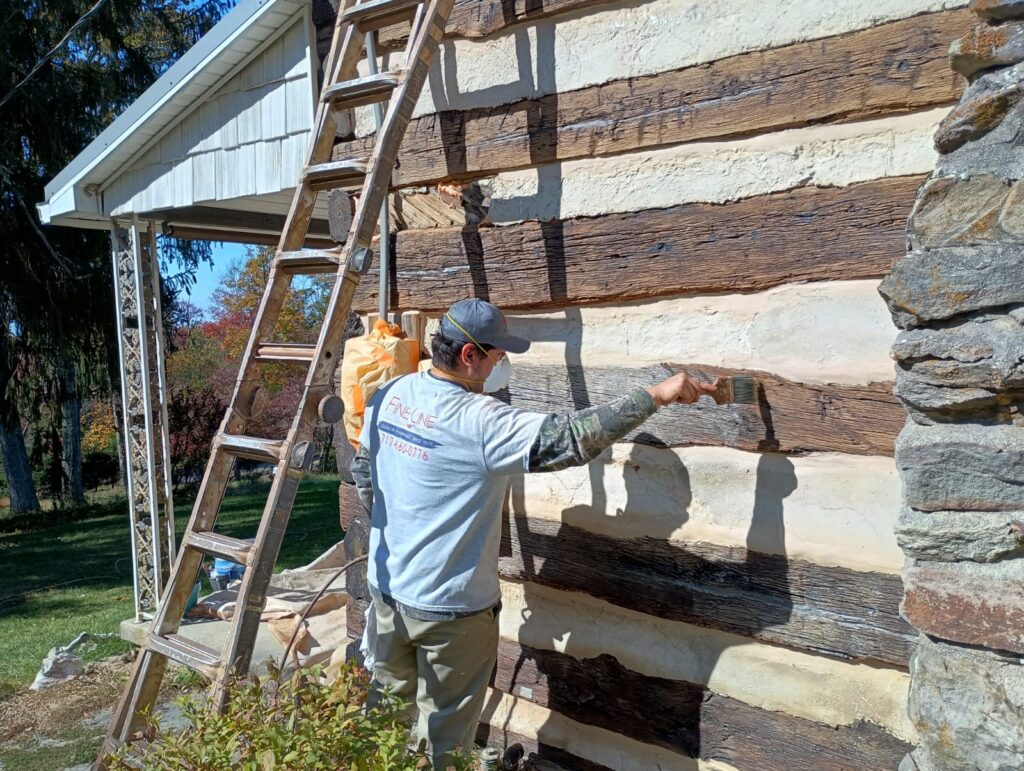
We recommend using Sascho stain (this is what we use on all of our log cabin and home staining projects). Apply stain to logs with a brush. Remember to back-brush and work on only 1-2 logs at a time, ensuring there are no drips. By using a brush, you are able to apply thoroughly, identifying any missed spots along the way.
Depending on the type of wood you are staining, apply 2-6 coats of stain.
11. Allow 24 Hours In Between Coats
Like we said before, patience.
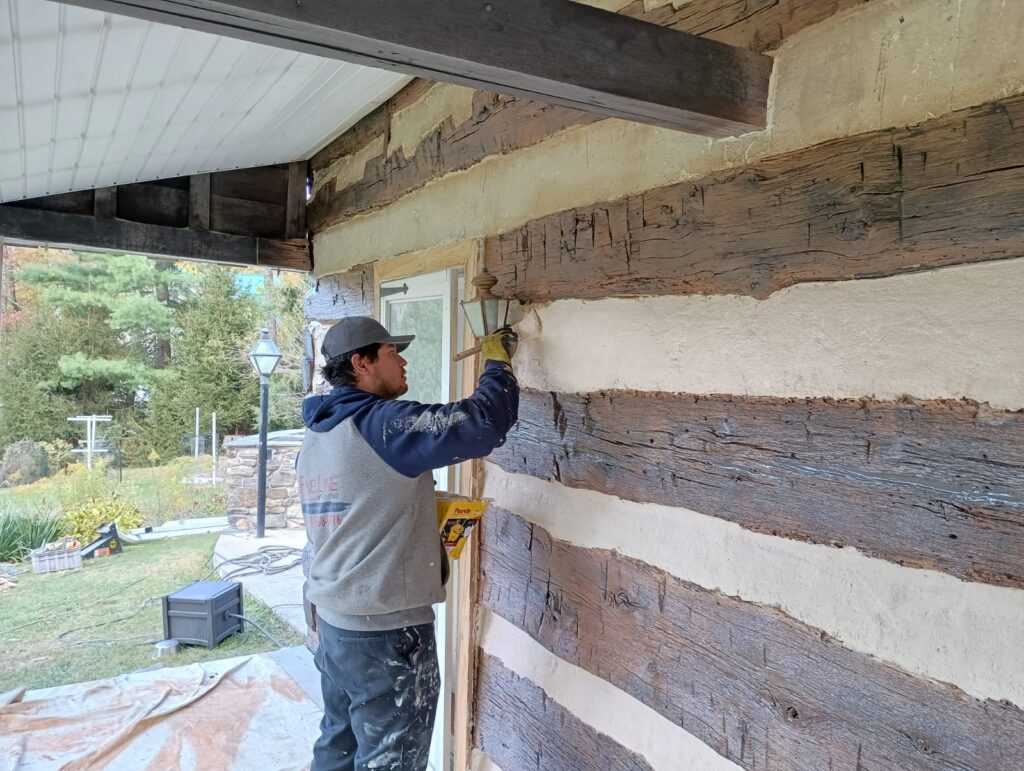
12. Paint The Chinking
Paint over all the chinking. Use chinking paint that matches the aesthetic of your cabin. Because chinking dries differently from wood, test a small portion first to see if you’re satisfied with the color.
13. Clean up!
Take off all the plastic, tape, and drop clothes so that you can see your finished log cabin. Isn’t it just beautiful?!
14. Relax
Wow, that was quite the project. But you did it! Now, it’s time to sit back and relax and absorb all of the beauty of your stained log cabin and painted chinking. Every time you spend a weekend in your log cabin or invite guests, you’ll feel fulfilled and accomplished. Great work!
FAQs: How To Stain A Log Cabin With Chinking
Can you stain over chinking?
No. And yes. It’s a bit confusing. While you can stain over chinking, we do not recommend it. Chinking does not absorb stain like wood does. Therefore, if you are looking to add aesthetic to your chinking, we recommend choosing a chink paint that will get the job done and coincide with the color of your cabin’s stain.
What is the best way to stain a log cabin?
To ensure that you stain your log cabin correctly, it’s important to inspect all of the logs for cracks and defects in the chinking. Make sure you use a glass blast machine to remove all of the old stain. Fill in all of the cracks in the logs and chinking. Then, using a brush, back-brush each of the logs, one at a time. Ensure that you allow each coat to dry for at least 24 hours before starting the next coat.
This is the summarized answer. Read our entire article for a complete step-by-step analysis.
Do I have to sand down to the bare wood before staining?
Yes. You don’t want to stain on existing stain, as it will reduce the overall quality of your finished product. Before you start a new staining job, use a glass blast machine to peel off the old stain. Or, you can also sand and buff all of the logs.
How long does log chinking last?
While there are many variables, typically, your log chinking will last for 20-50 years if applied correctly.
How to fix chinking?
If your chinking has cracks in it or is missing portions, you can patch that up, using a caulk gun full of log chinking. Once you’ve applied the chinking to your log cabin or home, you must smooth it out using a dry, clean brush.
How much does it cost to stain a log cabin?
The cost to stain a log cabin varies considerably based on the size of the log cabin and any existing damage to the cabin. If you would like to get a better estimate, fill out our free quote form.
Conclusion
Well, that was a lot of information. Hopefully, you got all the answers to your question: how should I stain a log cabin with chinking? And if reading this whole article made you feel overwhelmed, we would love to come alongside of you and stain your log cabin for you. Simply contact us, and we’d be thrilled to help you get this project done!
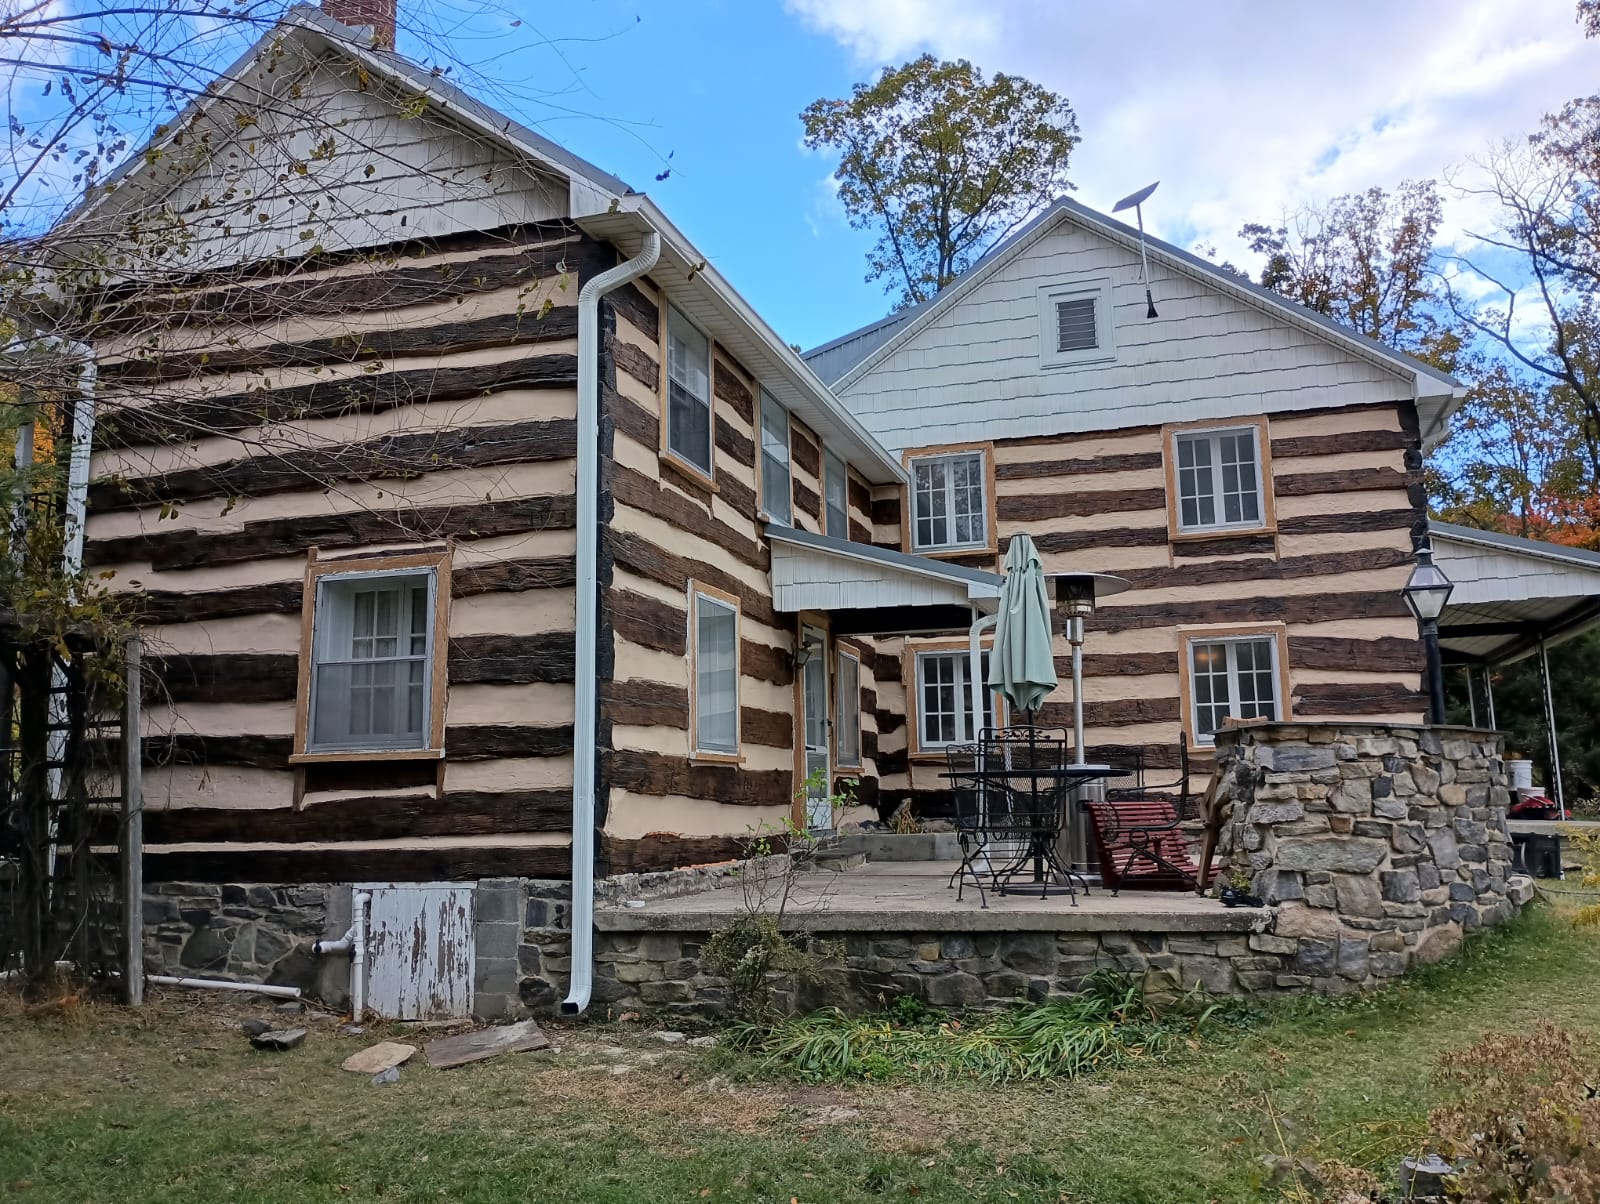
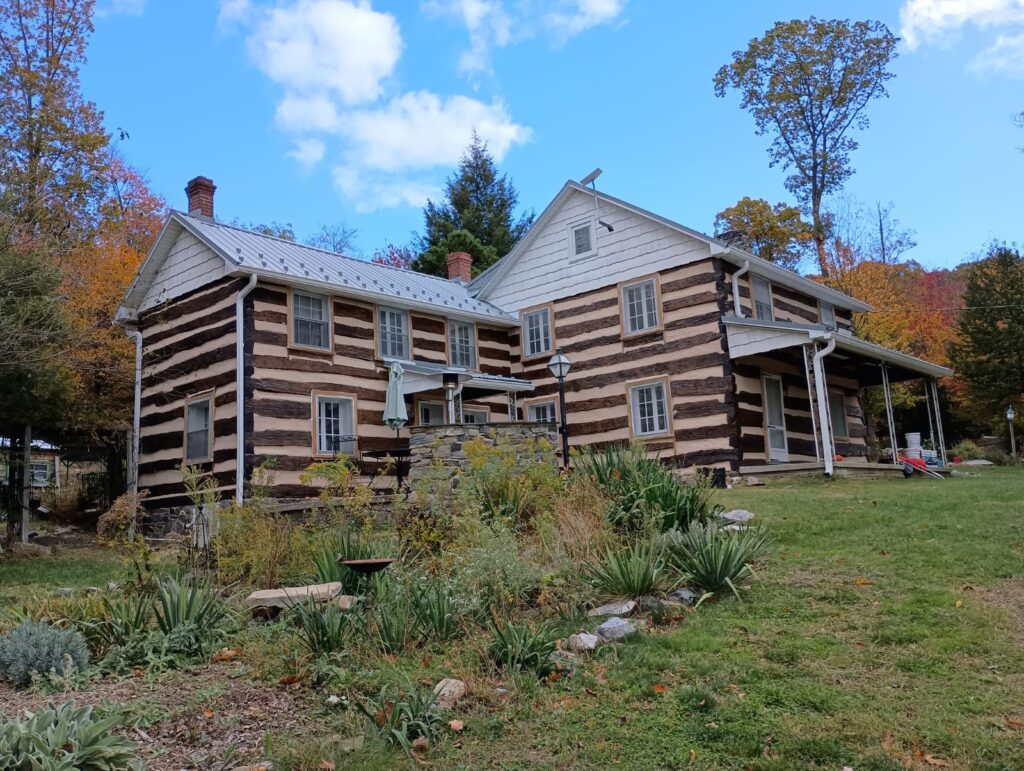
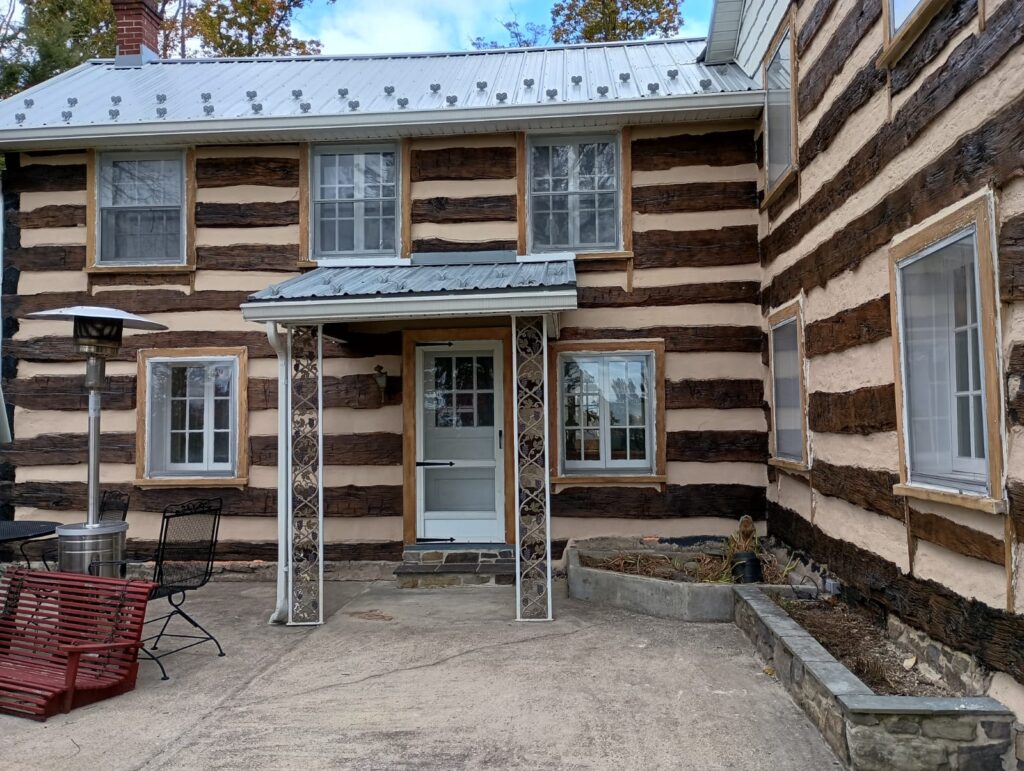
At Fine Line Painting, we have over 46 years of expertise, painting and staining log cabins all over Lebanon and Lancaster, PA. Check out this log cabin staining and chinking job we finished, for more inspiration.
